 The Moon Base
Front page - Ascent stage mid-section structure - Back-section structure - Back-section details - Mid-section cabin - Mid-section details - Front-section structure
Forward-section cockpit - Forward section details - Completed ascent stage - Descent stage - Moon base - Completed model
The Moon Base
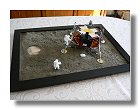
 The Moon base was the last item on the list. Since I made the model as accurate as possible I also tried to make a Moon
base as close as possible from the real Tranquillity base. I tried to figure out the correct disposition of craters and main
rocks but also the footprints of Neil armstrong and the items left on the Moon at the moment Neil took picture
AS11-40-5867. For this purpose I extensively used images from the actual Apollo 11 mission (magazine AS11-40/S) and
video from spacecraft films. Using angle 3 on the EVA video (TV picture + 16 mm film + AS1140/S magazine) it was
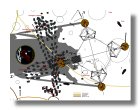
possible to figure out Neil's path on the surface. The result of that research was the map in figure 1 which I used for
building a 50 x 70 cm lunar base. Before doing that actually I figures out what, besides the lunar module was on the lunat surface at the moment
Neil took picture AS11-40-5867.
The Moon base was the last item on the list. Since I made the model as accurate as possible I also tried to make a Moon
base as close as possible from the real Tranquillity base. I tried to figure out the correct disposition of craters and main
rocks but also the footprints of Neil armstrong and the items left on the Moon at the moment Neil took picture
AS11-40-5867. For this purpose I extensively used images from the actual Apollo 11 mission (magazine AS11-40/S) and
video from spacecraft films. Using angle 3 on the EVA video (TV picture + 16 mm film + AS1140/S magazine) it was
possible to figure out Neil's path on the surface. The result of that research was the map in figure 1 which I used for
building a 50 x 70 cm lunar base. Before doing that actually I figures out what, besides the lunar module was on the lunat surface at the moment
Neil took picture AS11-40-5867.
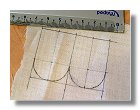
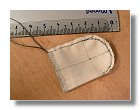
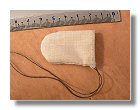
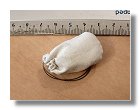
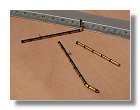
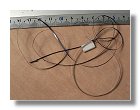
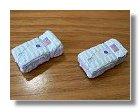
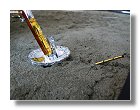
The first thing thrown away on the Moon was the jettison bag which I build as in figures 2. I also had to figure out the position of the landing probes underneath landing pads +Y, -Y and -Z, the configuration of each probe is found in page 2 of figure 1 while the construction is shown in figures 3, I used a strong piano string for each probe. The last things that needed to be made were the lunar equipment conveyor (LEC) and the contingency sample collector. The LEC (figure 4) was used to convey things from the LM to the ground and vice versa. Neil used it to recover the Hasselblad camera which he could not wear on his PLSS remote control unit since the LM hatch was not wide enough to get out of the LM with the camera attached.
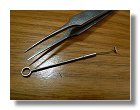
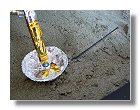
Since I wanted to represent the moment Neil was taking picture AS11-40-5867 this meant in the mean time that he managed to get the contingency sample. For this purpose he used the contingency sample collector that he left on the surface of the Moon prior to taking that picture. I then made a model of that collector (figure 5) that would eventually be left on the lunar base.
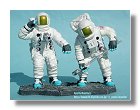
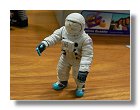
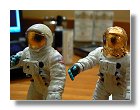
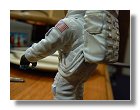
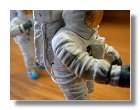
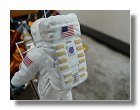
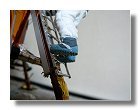
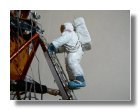
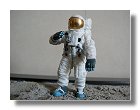
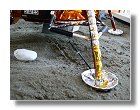
The two astronauts figures that I used for the model were two 1/24 figures from Dragon Model Can.Do brand. The original figures are shown in figure 6, coutesy of Takeshi Muto from the escellent Apollo Maniacs web site. I used two of the left figures and one right figure. The main astronaut body for both Neil and Buzz is the left figure. For Neil I just had to reposition his right hand as he was going to use his Hasselblad camera. For Buzz I replaced his right hand with the one from the right figure while I twisted his hand to be able to catch the ladder. The OPS was too large so I had to make it slimmer. I also had to rework the helmet and used gold baremetal for the visor. Eventually I added the Moon boots foot print, the LEC attachment system and painted the PLSS back.
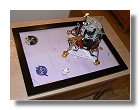
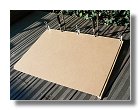
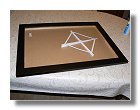
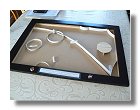
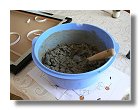
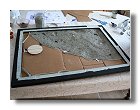
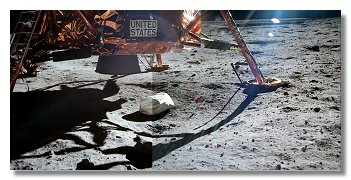
For the lunar base I used an Ikea picture frame. Since I wanted to have the LM tilted as on Tranquillity base, the frame had to be deeper that the original one so I could show the relief of the landing site.
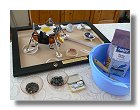
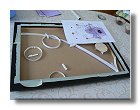
For that purpose the height of the frame was enlarged. I used mortar for the lunar soil but in the highest regions I added some cardboard in order to minimize the amount of mortar needed to fill the frame
and thus reduce the weight. The landing pads were enclosed in aluminium paper during the building process and I made sure to place the landing probe in the correct positions while making trenches when
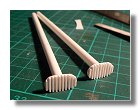
this was needed. Among thinks used for making the lunar base, the light bulbs allowed me to make nice round craters on the surface. The whole building process is described in figures 7.
|
|
|
|
|
|
|
2a, b, c, d : Jettison bag - June 2011 |
3a, b : Landing probes - June 2011 |
4 : LEC - June 2011 |
||||
|
|
|
|
|
|
|
5 : Contingency sample collector - June 2011 |
6a, b, c, d, e : Astronauts - June 2011 |
|
||||
|
|
|
|
|
|
|
6f, g, h, i, j : Astronauts - July 2011 |
7a, b : Lunar base - June 2011 |
|||||
|
|
|
|
|
|
|
7 c, d, e, f, g, h, i: Lunar base - June - July 2011 |
||||||
|
|
|
|
|
|
|
7 j, k, l, m : Lunar base - June - July 2011 |
|
|
|
|||
Photos Vincent Meens - June-July 2011
Front page - Ascent stage mid-section structure - Back-section structure - Back-section details - Mid-section cabin - Mid-section details - Front-section structure
Forward-section cockpit - Forward section details - Completed ascent stage - Descent stage - Moon base - Completed model