APOLLO 16 - Descartes Highlands
Apollo 16, Descartes Highlands, EVA 1, 21 April 1972, frames A16-113-18323 to A16--113-18330. Panorama taken by Charlie Duke at the start of EVA-1. It shows the crater behind the LM that John Young overflew on his final approach and Stone Mountain in the background
Apollo 16, Descartes Highlands, EVA 1, 21 April 1972, frames A16-113-18339 and A16--113-18341. John Young jumps off the ground and salutes the flag. Minutes later John Young and Charlie Duke traded places while Young took a picture of Charlie Duke saluting. The two pictures were merged keeping John Young jumping on the first one and back on the ground on the second one.
Apollo 16, Descartes Highlands, EVA 1, 21 April 1972, frames A16-109-17787 to A16--109-17791. Panorama taken by Charlie Duke at Station 1. John Young (seen twice on this picture) has left the Rover and is coming over to join Charlie Duke. At the right side of the picture is Plum Crater. Stone Mountain is in the background. Iin the distance one can see the white ejecta of South Ray Crater.
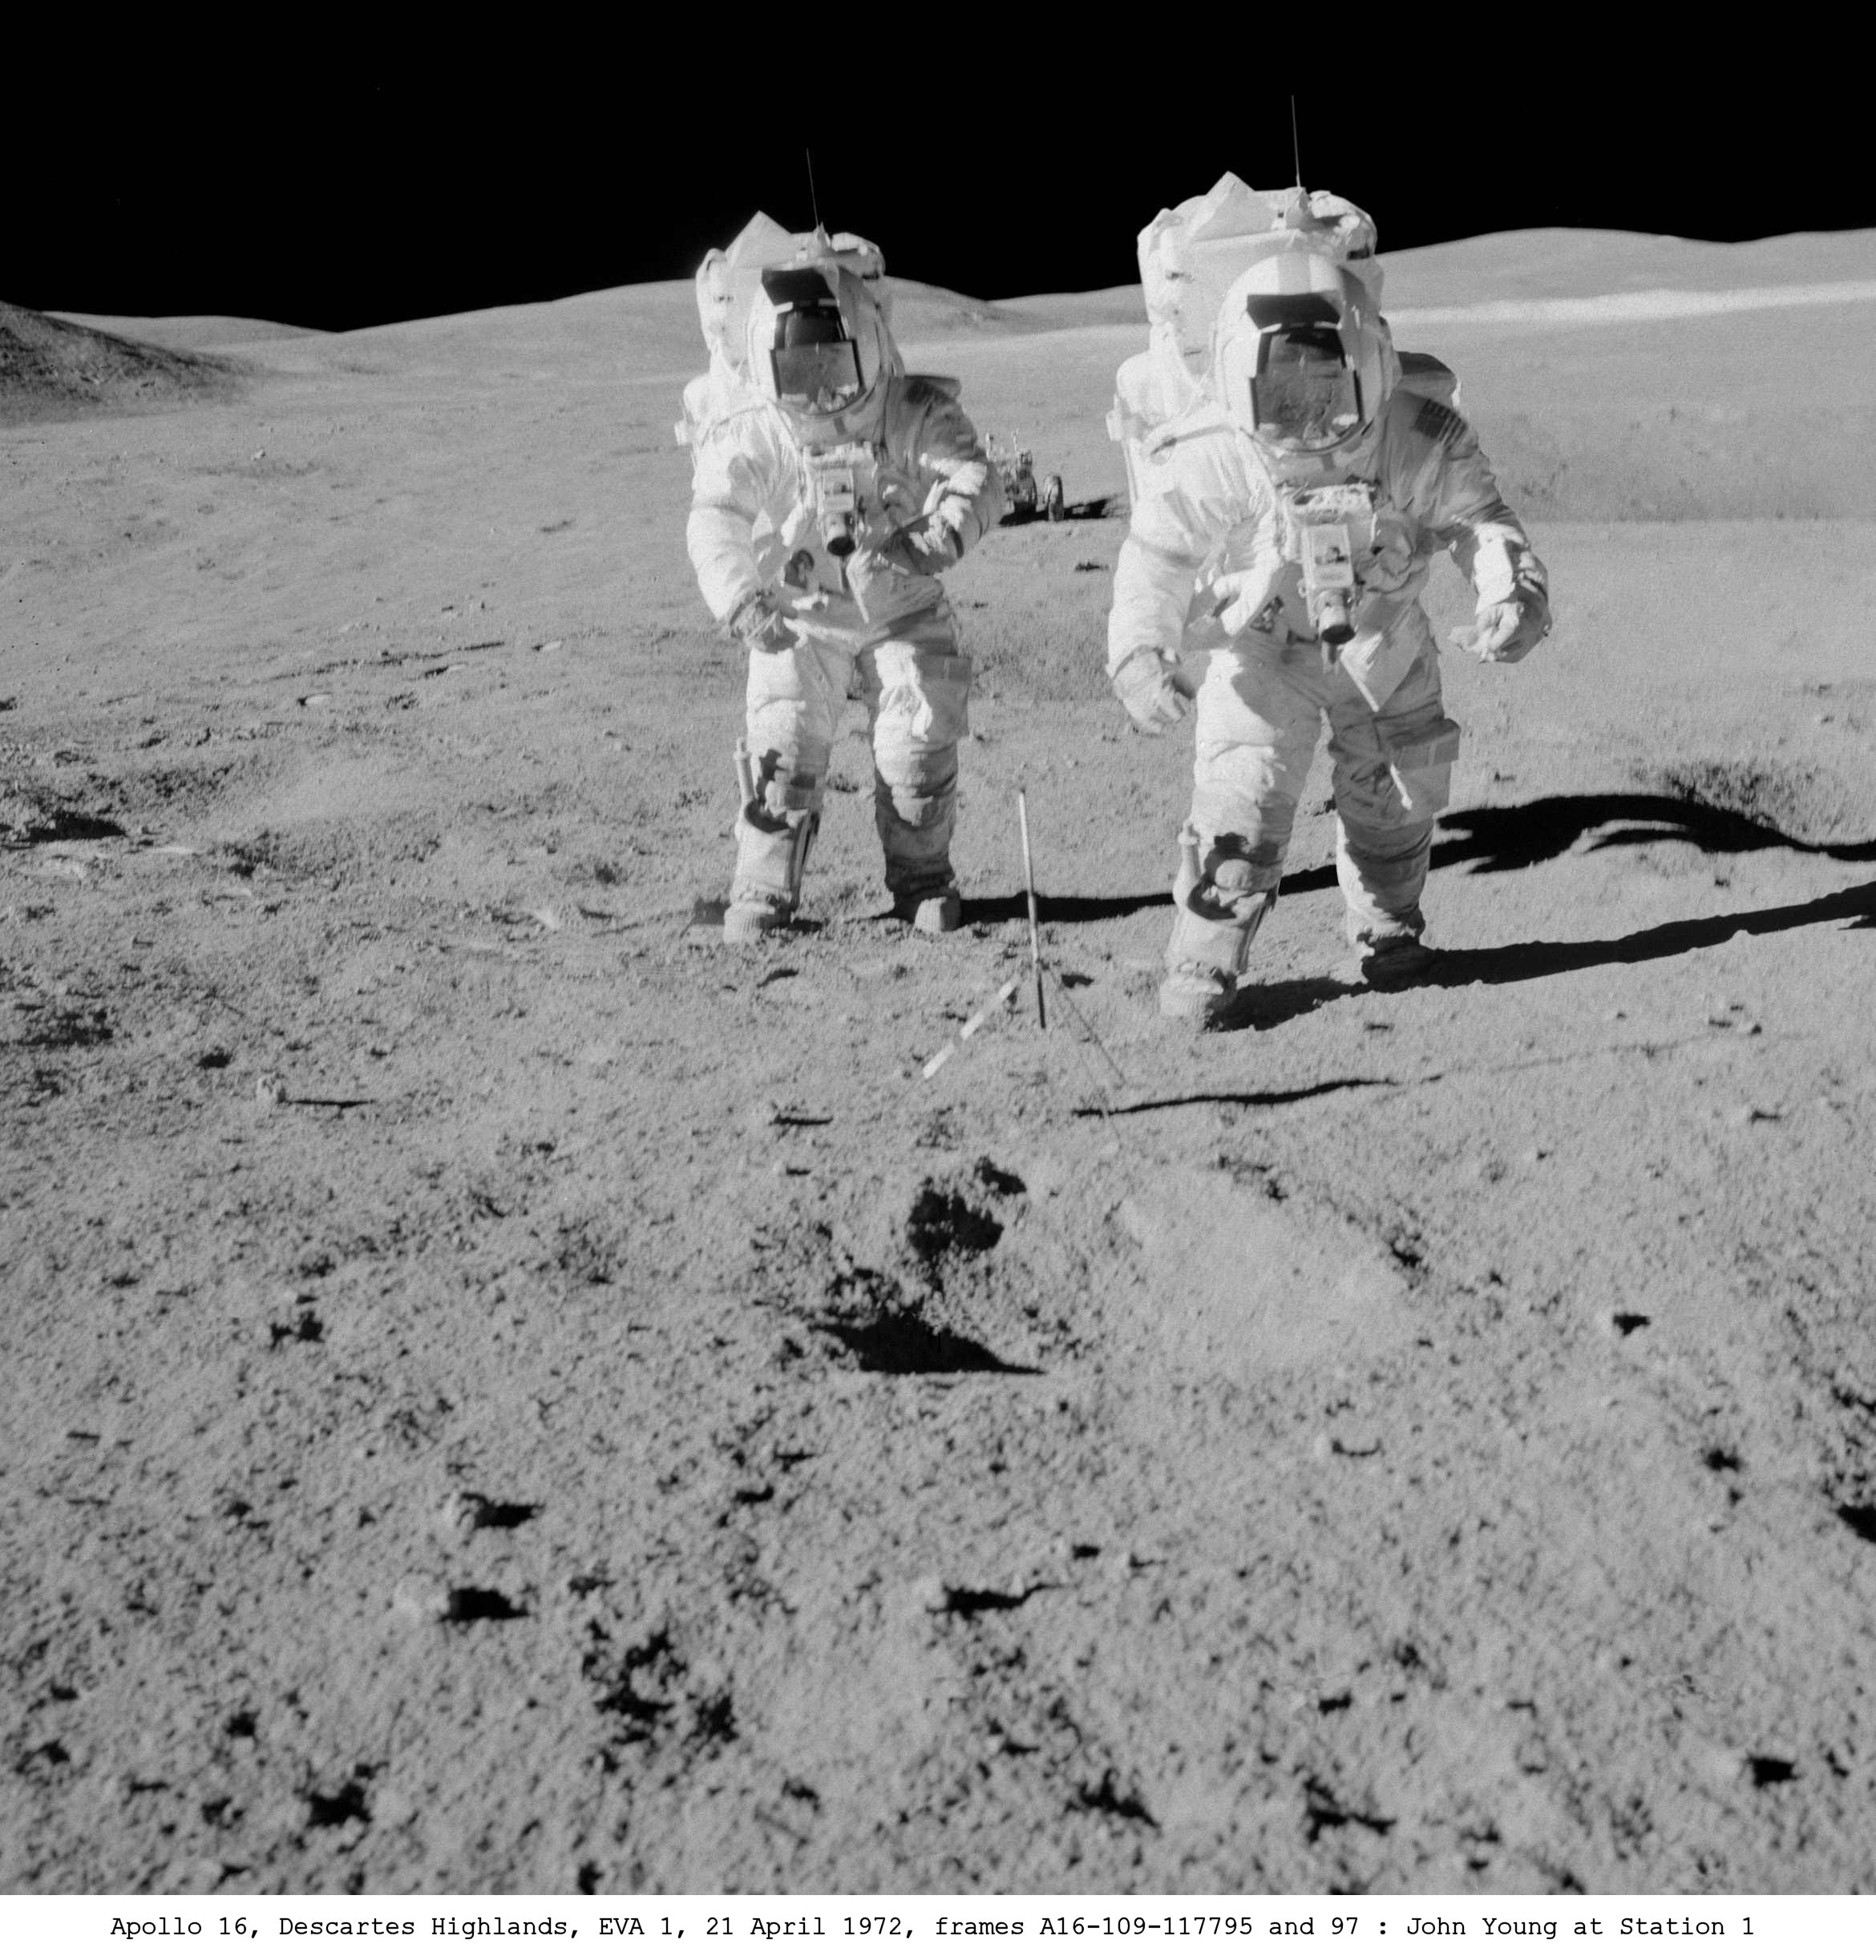
Apollo 16, Descartes Highlands, EVA 1, 21 April 1972, frames A16-109-17795 and A16--109-17797. Following the Panorama taken by Charlie Duke at Station 1. John Young (seen twice on this picture) has left the Rover and is coming over to join Charlie Duke.
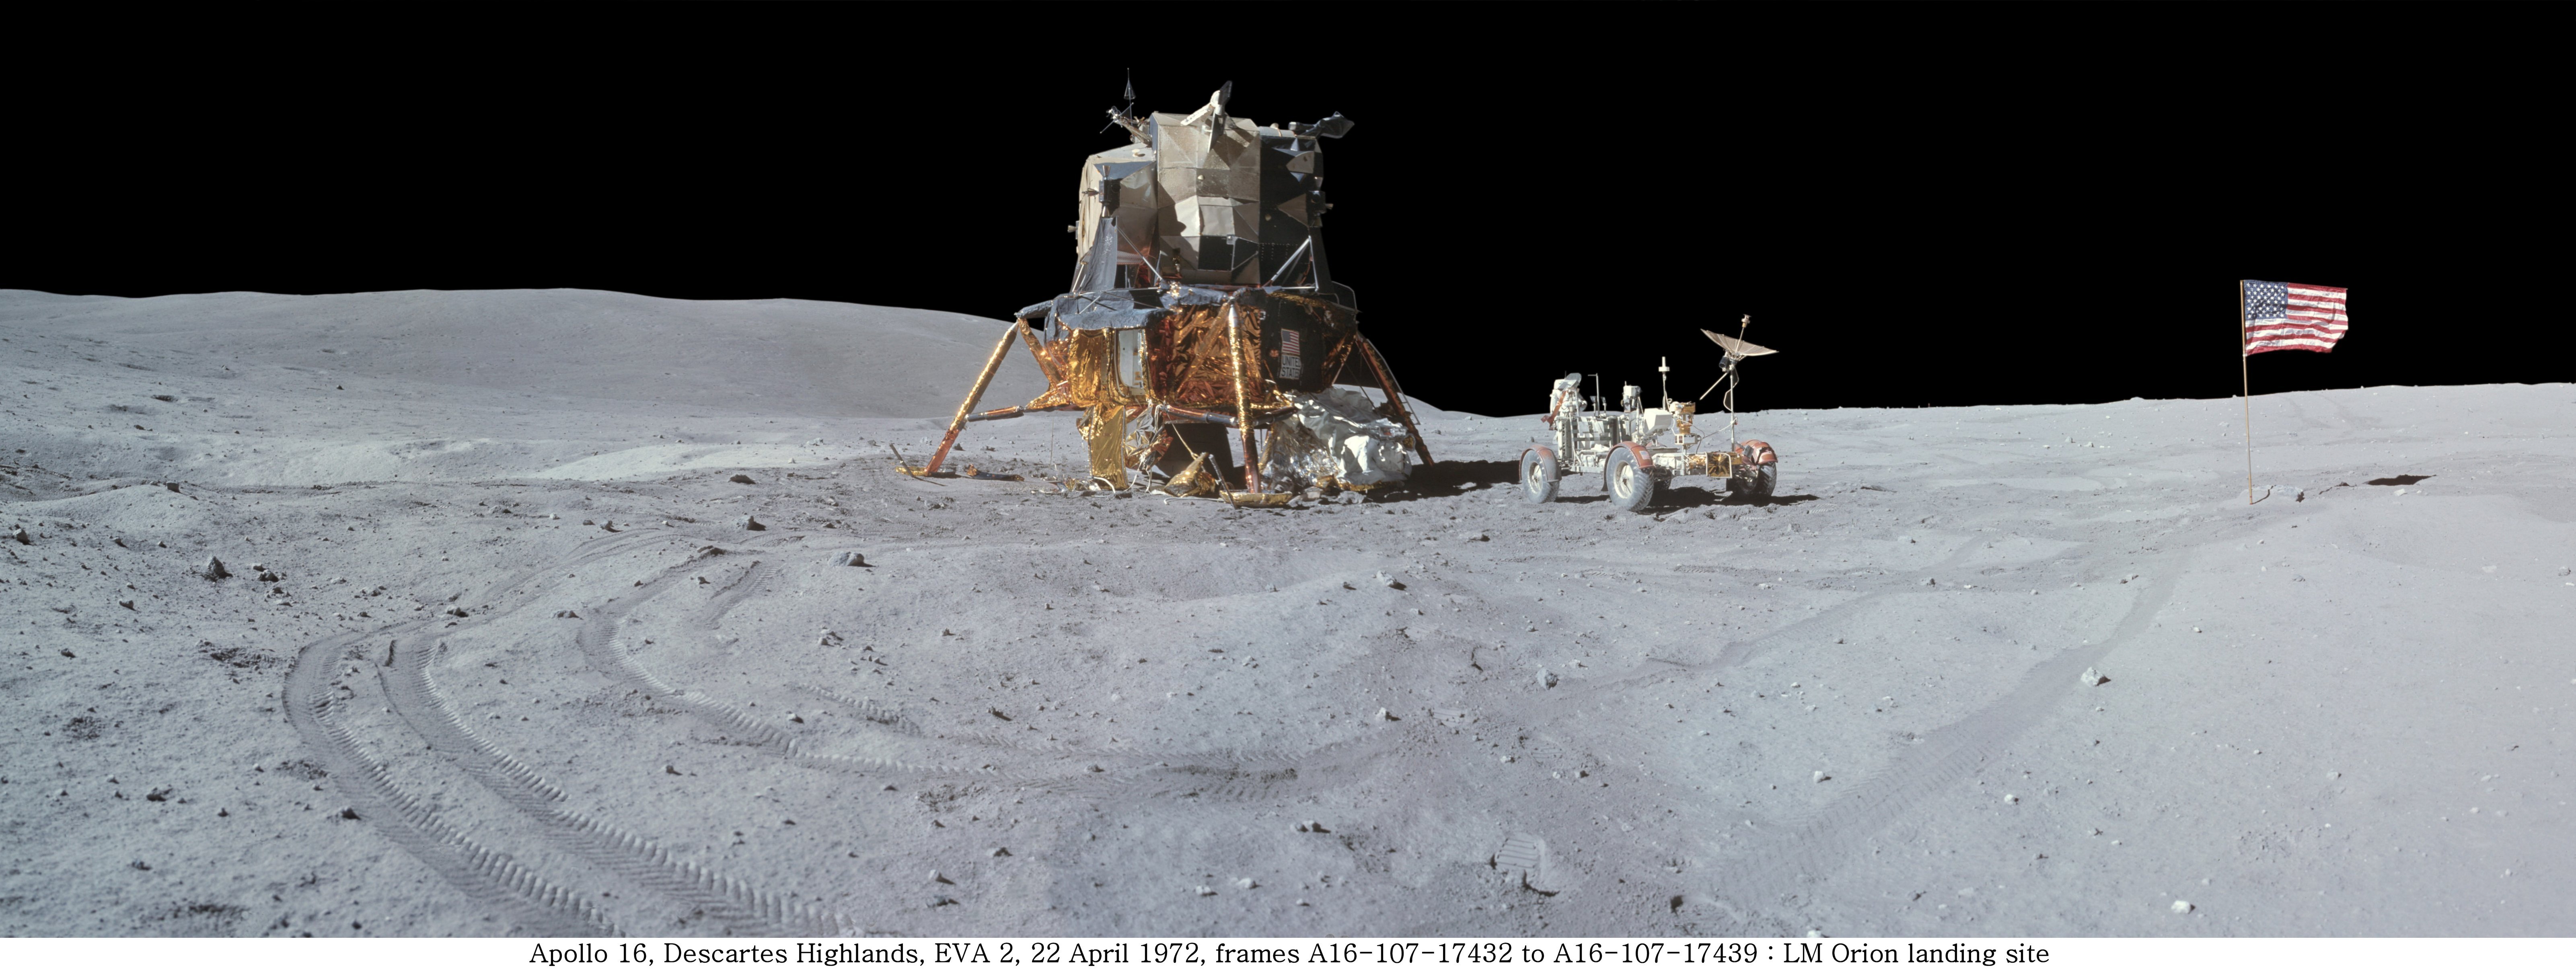
Apollo 16, Descartes Highlands, EVA 2, 22 April 1972, frames A16-107-17432 to A16-107-17439. Panorama taken by Charlie Duke at the start of EVA-2. It shows the LM, MESA, Rover. John Young is beyond the Rover collecting a rock sample.
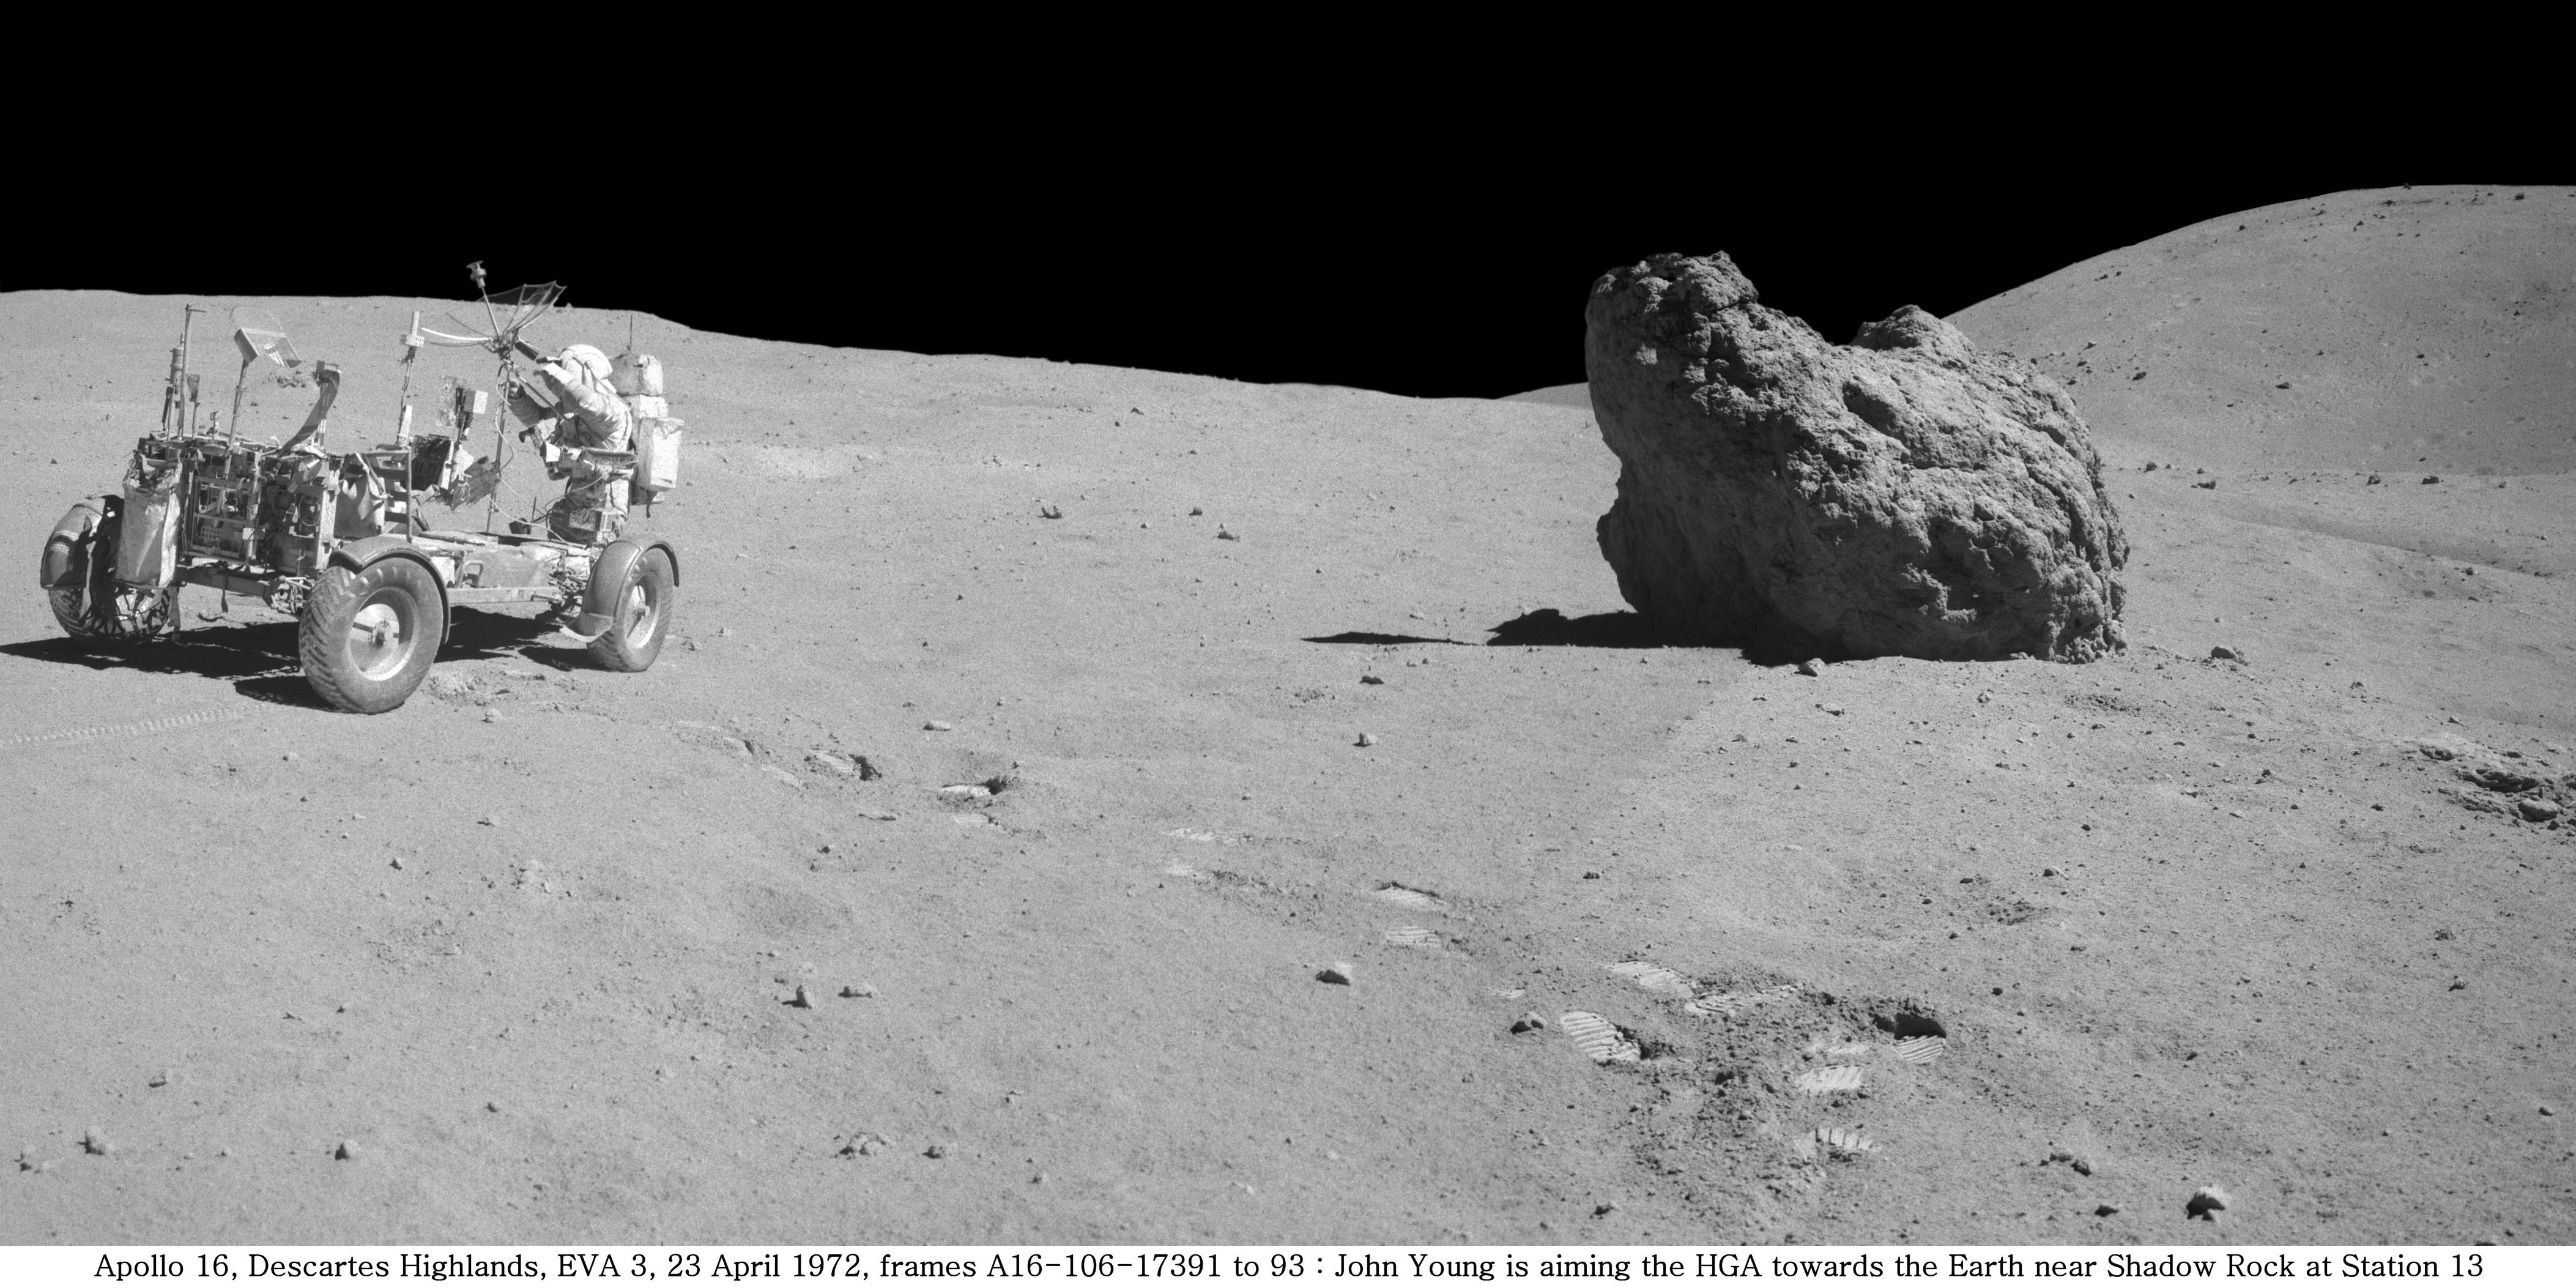
Apollo 16, Descartes Highlands, EVA 3, 23 April 1972, frames A16-106-17391 to A16-106-173939. Panorama taken by Charlie Duke at Station 13. The rover is parked near Shadow Rock. John Young is aiming the high gain antenna toward the Earth.
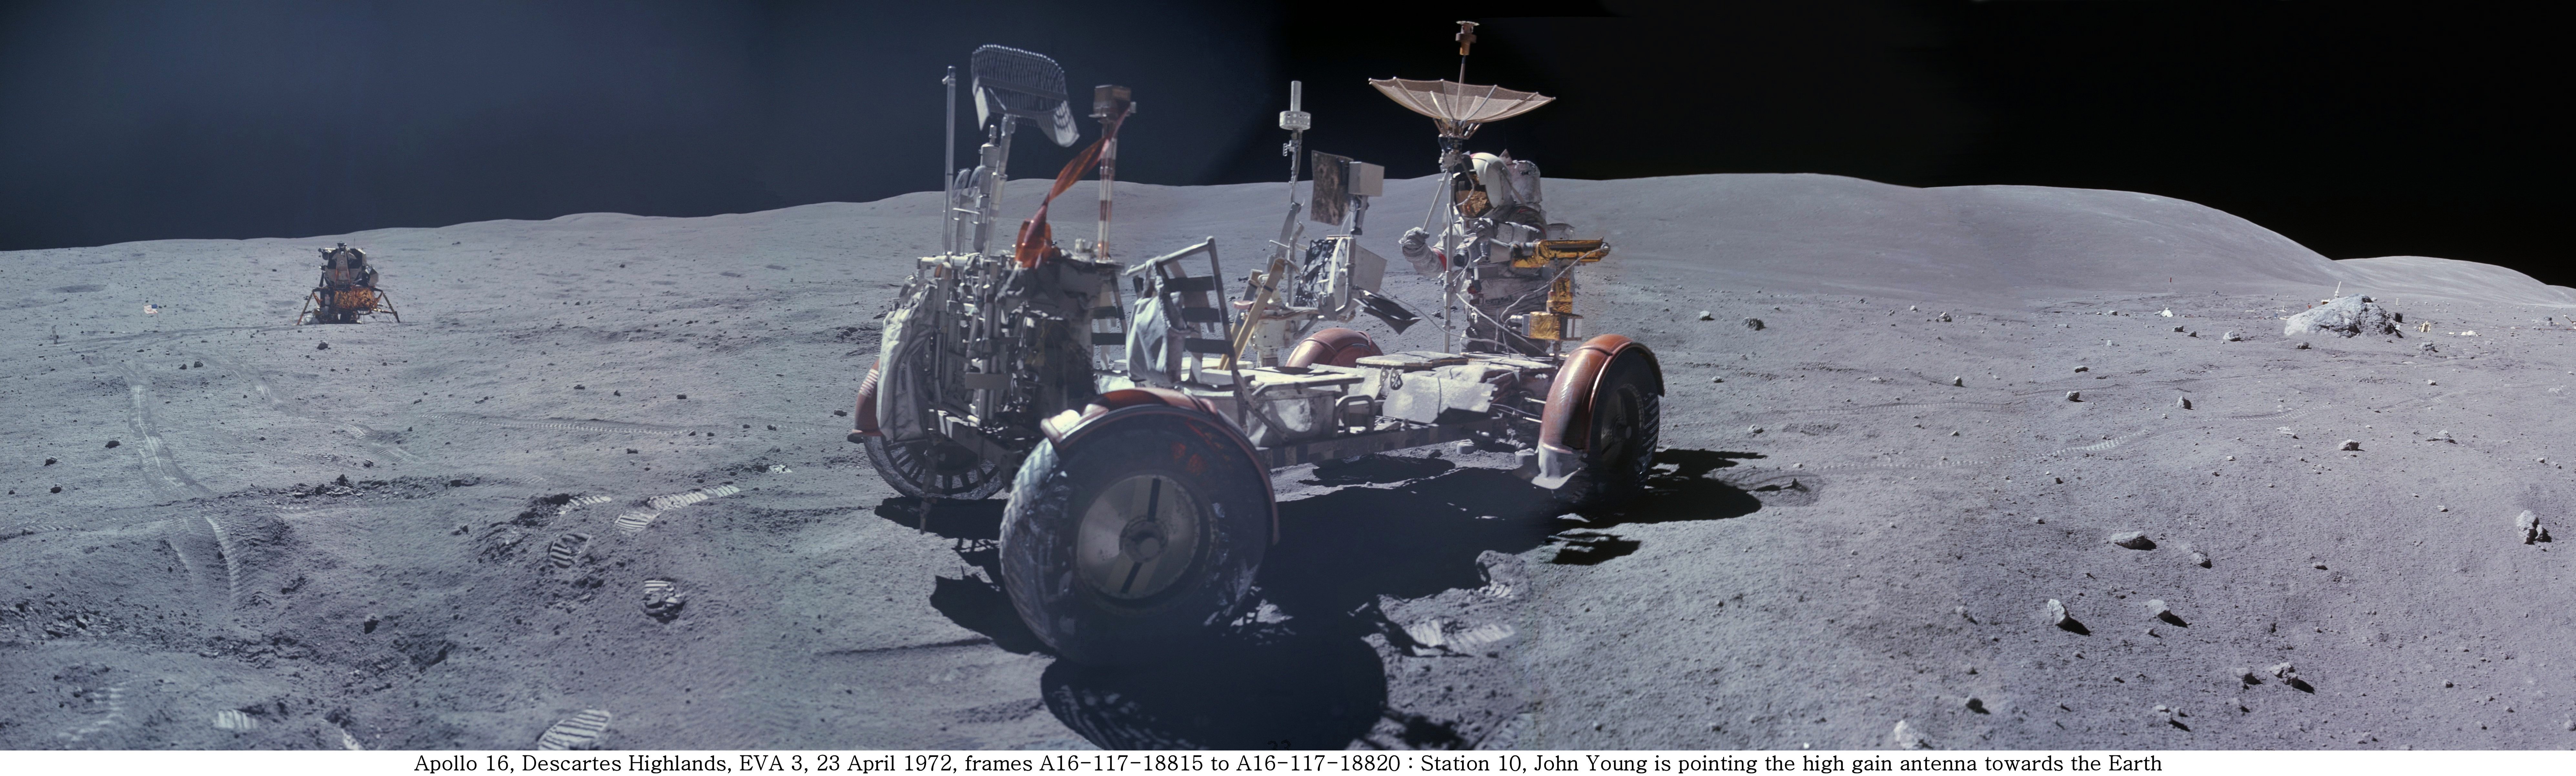
Apollo 16, Descartes Highlands, EVA 3, 23 April 1972, frames A16-117-18815 to A16-117-18820. Panorama taken by Charlie Duke at the end of EVA-3 at Station 10. John Young is pointing the high gain antenna towards the Earth. Note the LM on the left and the ALSEP on the right.